In some cases a system administrator needs to use old versions of certain software in order to get a development version. In this case we need to deploy a JBoss 7 AS inside a Centos 7.
Remember that JBoss 7 AS is unmaintaned and no loger supported. Try Wildfly for production
Second this is a manual to configure a Development Server not suitable for production use.
We start this configuration from a Centos 7 minimal
1 Update system
simply execute
yum install epel-release
yum install htop vim wget
yum -y update
2 Download JBoss Server
we need to download JBoss Server from http://jbossas.jboss.org/downloads
cd /opt
wget http://download.jboss.org/jbossas/7.1/jboss-as-7.1.1.Final/jboss-as-7.1.1.Final.tar.gz
3 Uncompress jboss
tar xzvf jboss-as-7.1.1.Final.tar.gz
mv jboss-as-7.1.1.Final jboss
4 create jboss user in system
adduser jboss
5 Change jboss ownership
chown -R jboss:jboss jboss
6 Install Java
in this case we will need java 1.7 you can use 1.6, 1.7 or 1.8
yum install java-1.7.0-openjdk
7 open ports
port 8080 must be opened
firewall-cmd --permanent --add-port=8080/tcp
firewall-cmd --reload
8 launch jboss to test
su jboss
cd /opt/jboss/bin
./standalone.sh -b 0.0.0.0
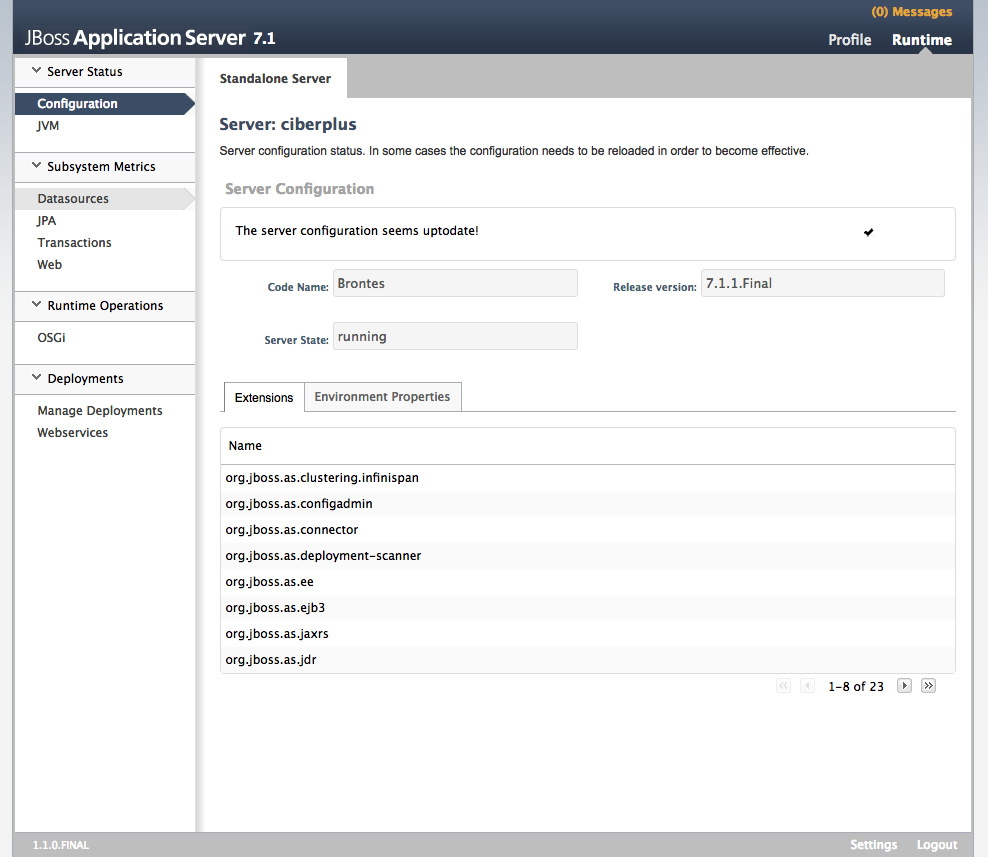
from your favorite browse writing http://your_server_ip_goes_here:8080 you should view this screen

you can stop jboss pressing Ctrl+c in your keyboad
9 configure jboss binding IP
I don’t want pass parameters when starting jboss, in this case we need to configure binding address
vim /opt/jboss/standalone/configuration/standalone.xml
at line 280 we need to change our xml to look like this
 <interface name="public">
 <inet-address value="${jboss.bind.address:127.0.0.1}"/>
 </interface>
to this
 <interface name="public">
 <inet-address value="${jboss.bind.address:0.0.0.0}"/>
 </interface>
now executing
./standalone.sh
you should view your jboss screen
10 step configure jboss as a systemd service
at this point we can start our service manually, adding some automation is necessary to avoid midnight phone calls
we need to define a unit for jboss
exit

vim /usr/lib/systemd/system/jboss.service
Add this content to unit file
[Unit]
description=JBoss 7 AS Application server
Wants=network-online.target
After=network-inline.target

[Service]
Type=simple
User=jboss
Group=jboss
ExecStart=/opt/jboss/bin/standalone.sh

[Install]
WantedBy=multi-user.target
now you can enable your jboss service
systemctl start jboss
open your browser and check if you can see the magical screen
After this we need to enable the service
systemctl enable jboss
11 Enable access to Jboss admin console Optional
When we need to manage our jboss in this case we will need to execute these commands
systemctl stop jboss
cd /opt/jboss/bin/
./add-user.sh
follow screen instructions to add your desired admin user
[root@mymachine bin]# ./add-user.sh
What type of user do you wish to add?
a) Management User (mgmt-users.properties)
b) Application User (application-users.properties)
(a): a

Enter the details of the new user to add.
Realm (ManagementRealm) :
Username : desiredusername
Password :
Re-enter Password :
About to add user 'desiredusername' for realm 'ManagementRealm'
Is this correct yes/no? yes

Added user 'desiredusername' to file '/opt/jboss/standalone/configuration/mgmt-users.properties'
Added user 'desiredusername' to file '/opt/jboss/domain/configuration/mgmt-users.properties'
Getting access to management console requires open 9990 port
firewall-cmd --add-port=9990/tcp
cd /opt/jboss/bin/
./standalone.sh -b 0.0.0.0 -bmanagement 0.0.0.0
Now we can access to our management console using the added username and password.
When we have done our configurations we can stop our server pressing Ctrl+c
and closing ports running
firewall-cmd --reload
systemctl start jboss
12 Configurin MariaDB server
Our developer needs a MariaDB, Mysql Database in this server
yum install mariadb-server
systemctl start mariadb
systemctl enable mariadb
mysql_secure_installation
#follow instructions
mysql -uroot -p
create a database an user and grant priviledges
CREATE DATABASE my_db;
CREATE USER 'new_user'@'localhost' IDENTIFIED BY 'new_password';
GRANT ALL ON my_db.* TO 'new_user'@'localhost';
FLUSH PRIVILEGES;
13 Adding mysql driver
At this point Jboss needs talk to mysql/mariadb database, in this case we will download mysql driver
cd /opt

wget https://dev.mysql.com/get/Downloads/Connector-J/mysql-connector-java-5.1.43.tar.gz

tar xzvf mysql-connector-java-5.1.43.tar.gz

mkdir -p /opt/jboss/modules/com/mysql/main

cp mysql*/mysql-*.jar /opt/jboss/modules/com/mysql/main
we need to define the module to deploy “describe” Mysql Driver
vim /opt/jboss/modules/com/mysql/main/module.xml
fill with this content
<?xml version="1.0" encoding="UTF-8"?>

<module xmlns="urn:jboss:module:1.0" name="com.mysql">
<resources>
<resource-root path="mysql-connector-java-5.1.43-bin.jar"/>
</resources>
<dependencies>
<module name="javax.api"/>
</dependencies>
</module>
<pre>
We configure JBoss to load Mysql jdbc driver
vim /opt/jboss/standalone/configuration/standalone.xml
driver section should look like these arround line 101
 <drivers>
   <driver name="mysql" module="com.mysql">
      <driver-class>com.mysql.jdbc.Driver</driver-class>
   </driver>
 <driver name="h2" module="com.h2database.h2">
At this point our server is funcional, putting a war file at /opt/jboss/standalone/deployments should be enough to run a java program.
13 Compiling in our development machine.
In medium size projects some members does not have technical profiles, translators, designers …
Putting these profiles in front a Java development environment gives a sensation of they are controlling a space shuttle launch, compiler messages scrolling at high speeds running strange programs in their computer etc.
For minimize this sensation we will make that our development machine compile java sources and run user modifications.
Our project uses Maven for dependency resolution first of all we need to install maven in our development machine
yum install maven
14 Using git for deploy
We will use compile our sources and git for manage sourcecode changues
yum install git
We will use jboss user to deploy our sourcecode
as jboss user we will create an empty repository
su jboss
mkdir /home/jboss/my_project_repo
cd /home/jboss/my_project_repo
git init --bare
At this point we have a empty repository but we need to add our ssh key
mkdir -p /home/jboss/.ssh/

vim /home/jboss/.ssh/authorized_keys
paste your public key
now from our workstation we can add our deploy repo like this
git remote add dev_server ssh://jboss@<dev_server_ip>/home/jboss/my_project_repo

git push dev_server master
now we can send our source code modifications but we adapt our app configuration.
in this case in our source code we have a file called default.properties with configuration data we will personalize our config here a example
## set these properties to fit with your local JBoss installation
jboss.as7.managementAddress=localhost
jboss.as7.managementPort=9999
jboss.as7.username=usercreatedinstep11
jboss.as7.password=passwordinstep11


## context path
context.path=ask-your-developer

## wicket configuration - development or deployment
configuration.mode=development

ds.name=yourdesiredds
ds.pool.name=yourdesireddds
dialect=org.hibernate.dialect.MySQL5InnoDBDialect
ds.connection.url=jdbc:mysql://localhost:3306/my_db
ds.driverclass=com.mysql.jdbc.Driver
ds.driver=mysql
ds.username=usercreatedinstep12
ds.password=passwordcreatedinstep12

## persistence.xml settings
ddl=create-drop
show.sql=false
format.sql=false
# relative to ${user.home}
lucene.index.base=.lucene_my_app
lucene.dir.provider=filesystem

## Business case data to be used
business.case=
we will put this file in /home/jboss/default.properties but we need to automatize our deploy
in our development server as jboos user
mkdir -p /home/jboss/my_project_compile

vim /home/jboss/my_project_repo/hooks/post-receive
a small example script should look like this
#!/bin/sh
git --work-tree=/home/jboss/my_project_compile --git-dir=/home/jboss/my_project_repo checkout -f
cd /home/jboss/my_project_compile
cp /home/jboss/default.properties /home/jboss/my_project_compile/default.properties
mvn package
rm -f /opt/jboss/standalone/deployments/*
cp /home/jboss/default.properties /home/jboss/my_project_compile/target/*.war /opt/jboss/standalone/deployments/
now with a git push we can view our changes
